MAYAN LOST TOMB [2025]
3D ENVIRONMENT DESIGN
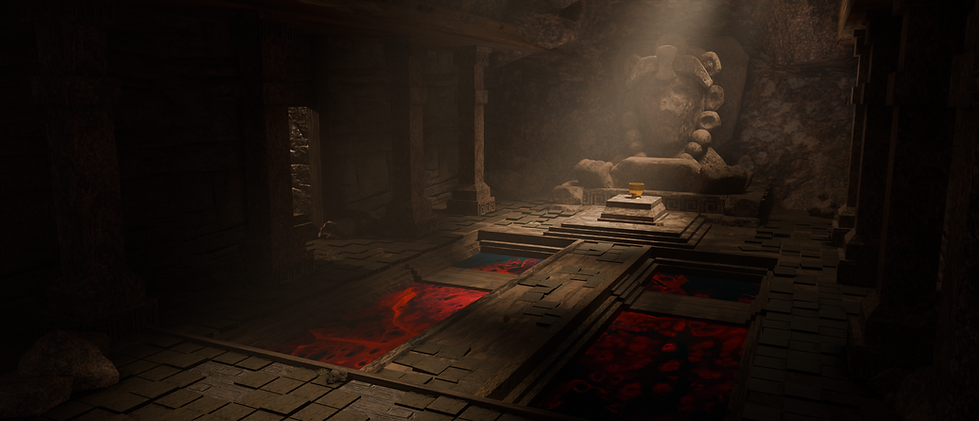
THIS TOMB WAS BUILT FOR A POWERFUL MAYAN KING. PEOPLE OFFERED BLOOD SACRIFICES TO GAIN HIS FAVOR AND FORTUNE. THE TOMB WAS LOST IN THE CAVE UNTIL AN ARCHAEOLOGIST REDISCOVERED IT. THIS WORK DONE IN BLENDER AND FINAL TOUCH ON PHOTOSHOP.
 |  |  |  |  |
|---|---|---|---|---|
 |  |  |  |

Design Process
For the first step of this project, I got inspiration from Shadow of the Tomb Raider, especially its beautiful environments and detailed props. After finishing the concept, I started to break it down to see how many different props I needed to make and which ones I could reuse. Then, I collected texture references to help me with sculpting and painting the models. The materials I used in this project include wood, metal, rope, fabric, and some small props.


Scuplting
After I decided on the concept I wanted to create, I started by sculpting the statue and the pillar in ZBrush. This step helped me explore and define the kind of details I wanted to include, like the shapes, surface textures, and overall feel. I didn’t worry too much about perfection yet, this part was more about testing ideas and seeing how they might look in 3D.


Scene blocking & Adjustment
Once I have the rough sculpts, I moved into Blender to start blocking out the scene. I placed the statue, the pillar, and other basic shapes to establish the composition and overall layout. Scene blocking helped me figure out the scale, proportions, and camera angles. I kept adjusting the position of each element until everything felt balanced and visually appealing. Finally, I added textures to get a clearer view of the overall look and feel of the scene.

Lighting
For the first lighting adjustment, I focused on getting a general feel for the scene and making the focal point stand out. However, the overall lighting turned out too bright, which made it difficult to direct the viewer’s attention to the main subject.

Render
After reviewing the initial scene, I decided to make some changes to certain elements and adjusted the lighting to create a more interesting and dynamic look. I focused on enhancing the contrast and positioning the lights in a way that draws more attention to the focal point. As a result, the main subject now stands out much more clearly, just as I intended. I also added a layer of fog to introduce a subtle god ray effect, which not only highlights the focal area but also adds a more dramatic and epic atmosphere to the overall scene.

Paint over & Compositing
Lastly, I moved into Photoshop to do a paint-over of the scene. My goal during this step was to soften the overly sharp edges of the 3D models so they wouldn't look too digital or artificial. I carefully painted over certain areas to blend the elements more naturally and to guide the viewer’s eye through the composition.
In some parts, I used photo bashing techniques by combining photographic textures with digital painting to add finer surface details that were difficult to achieve in the 3D stage. I also added subtle dust particles and atmospheric effects to enhance the realism. Finally, I adjusted the brightness and contrast to make the scene more visually striking and to bring out the mood I wanted to convey.

What did I learned from this project?
This was my first time creating a project in Blender, and it taught me a lot about how to make an environment visually appealing, especially from a concept art perspective. In the past, I mostly focused on making things practical and functional, but for this piece, I had to think more about how to make the scene both interesting and believable. I learned how to design a composition that catches the viewer’s attention and how to use color and lighting effectively to create a more dramatic and epic atmosphere. This experience helped me understand the artistic side of environment design, not just the technical aspects.


